Drawing Mini Tutorial
I know, my english is not so great, but I'd love to share my "techniques" (big word) with all of you, so please forgive in advance any mistake you'll see in this page.
Anyway, for those of you who are interested, here's how I draw a simple head in an anime/manga style. I used an original sketch and retraced the various Steps in Photoshop, so it should be easier to follow along.
Let's-a go!
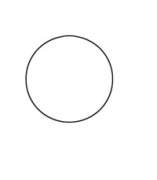 Step 1
I usually start with a circle. Of course, it doesn't matter if it's not perfectly round, just make sure it's a circle, not a triangle.
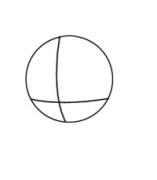 Step 2
A very important Step is putting two crossed lines in the circle so we will be able to arrange every part in the right order. As for this example, we'll put the right eye in the top-left quarter, the left eye in the top-right quarter, the nose somewhere below the center of the lines and the mouth just under the nose. By drawing the lines like that, we'll have a 3/4 portrait, so the head will be facing our left. As you can see, we have more "space" to draw eyes than the one to draw mouth and nose.
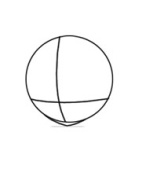 Step 3
Now let's refine our face. By using the cross as our guide lines, let's go a bit below the circle to add a not too pointy chin, just where the vertical line ends.
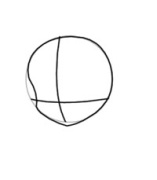 Step 4
As for the cheeks, remember to put them UNDER the horizontal line. Continue drawing and do a concave line that should reach the circle about halfway of the top-left quarter.
 Step 5
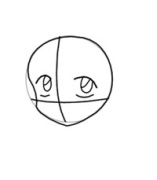
Aye aye eyes. One of the most important things, make sure to draw each one in its own quarter. In this example, since the head is facing our left, the first eye is slightly smaller and stretched than the second, which should be drawn in the middle of the bottom of the top-right quarter.
 Step 6
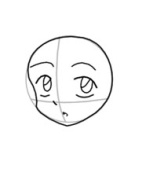
The nose (very tiny) shall go a bit below the horizontal line and in the direction the head is facing. As for the mouth, it should be between the two bottom quarters, halfway from the horizontal line and from the chin. Don't forget eyebrows, as they affect a face's expression.. In this case, two simple lines above the eyes should have to do the job.
 Step 7
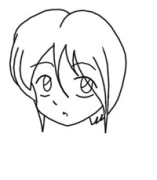
Hair! You can pretty much test every kind of hair you have in mind. Remember to draw continuous curve lines. Hair can go above the circle and even over the face.
 Step 8
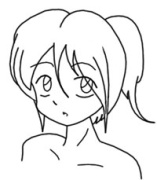
The lineart is done, now it's all about coloring. If you want, you can add other things, such as neck and shoulders to give it a more realistic feeling, this way it won't be just a weird floating head!